Visual Studio Code is a source code editor. It supports various programming languages and can be combined with
compilers to work as a package integrated development environment IDE.
VS Code has IntelliSense which allows word based completions. This you can write code syntax without typos.
You also get access to various extensions. These enhance the working of VS Code and also adds new features as
per requirements.
Editor - The main area to edit your files. You can open as many editors as you like side by side vertically and horizontally.
Activity Bar - Located on the far left-hand side, this lets you switch between views and gives you additional context-specific indicators, like the number of outgoing changes when Git is enabled.
Side Bar - Contains different views like the Explorer to assist you while working on your project.
Editor Groups - You can open multiple files and can split the screen to work with two or more files simultaneously.
Panels - You can display different panels below the editor region for output or debug information, errors and warnings, or an integrated terminal. Panel can also be moved to the right for more vertical space.
Status Bar - Information about the opened project and the files you edit.
Activity Bar: This includes the followings commands to manage open project: Explorer, Search, Source Control, Run & Debug and Extensions. You can switch between these to handle the project as per requirements.
Side Bar: In this area, you can create, delete and modify files of your project. You can also drag & drop files to organize content.
Note
When creating new files, PLEASE add an extension to the file. If no extension is provided, the file also has no extension!
Status Bar: It is divided in mainly two parts.
The left part consists of Project related stuff. Here you see master which is the working branch of the project. When you change the branch, it automatically sets it to default upload branch. The refresh icon synchronizes the content between server and local stored code. The icons near that shows information about the tips and errors in all opened files of the project.
The right part of the status bar shows properties related to the editor and user selected settings which apply to editor window.
Panels: The panels include Problems, Output, Debug console and Terminal. These can be opened from top Menu bar under View.
Note
The garbage can icon is used to kill the current Terminal session. If you kill the last terminal session, the Terminal tab will close automatically.
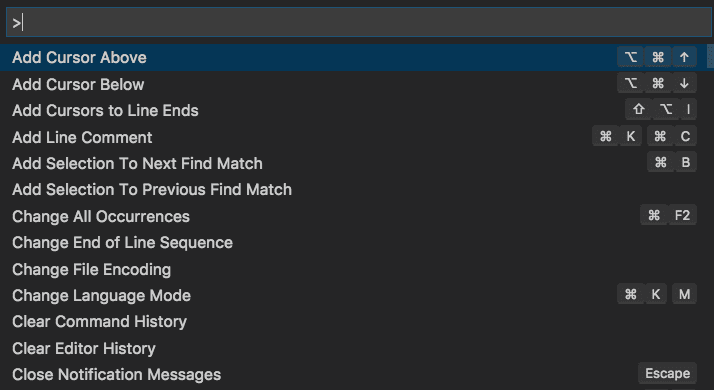
VS Code allows direct execution of commands for extensions. This can be done using Command Palette. Command Palette can be accessed from View -> Command Palette or using key combination CTRL + Shift + P.
To execute a command for an extension, always check for angle bracket symbol ( > ). Following the symbol, you can type the name of the extension and then you will see the different options / commands available.
When you modify settings, you will usually see 2 options, User Settings & Workspace Settings.
In user settings, the settings are saved for the user of the editor. These settings will be default for all projects opened afterwards.
In workspace settings, the settings are saved for only that specific instance of project. A new file gets created in the same project folder which can be shared with others so that everyone has the same settings while working on the project. For example, using tabs instead of spaces for indentation of code.
Before starting, please confirm you have access to GitLab server of University. You can check that by logging on the following website using your fh-kennung nummer (AB1234S) and passwort: https://git.fh-aachen.de/
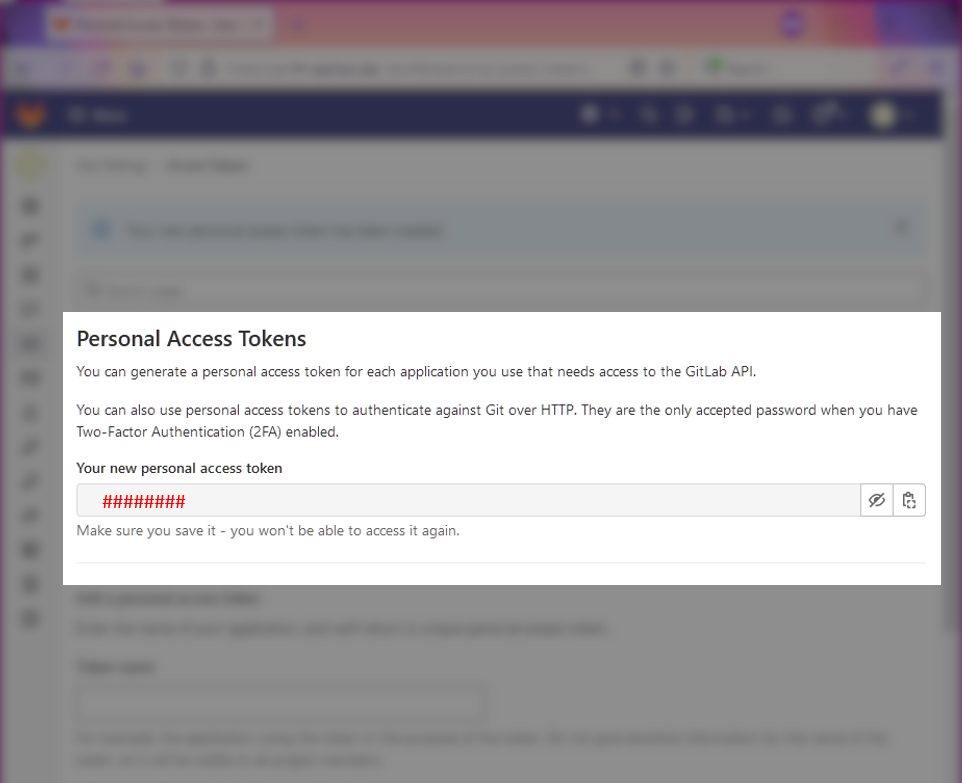
On this page, select Access Token from the left menu. On the new page, enter a name for token, for example: vscode_laptop. You can leave the Expiration date empty. select all checkboxes under Select scopes. Once done, click Create personal access token.
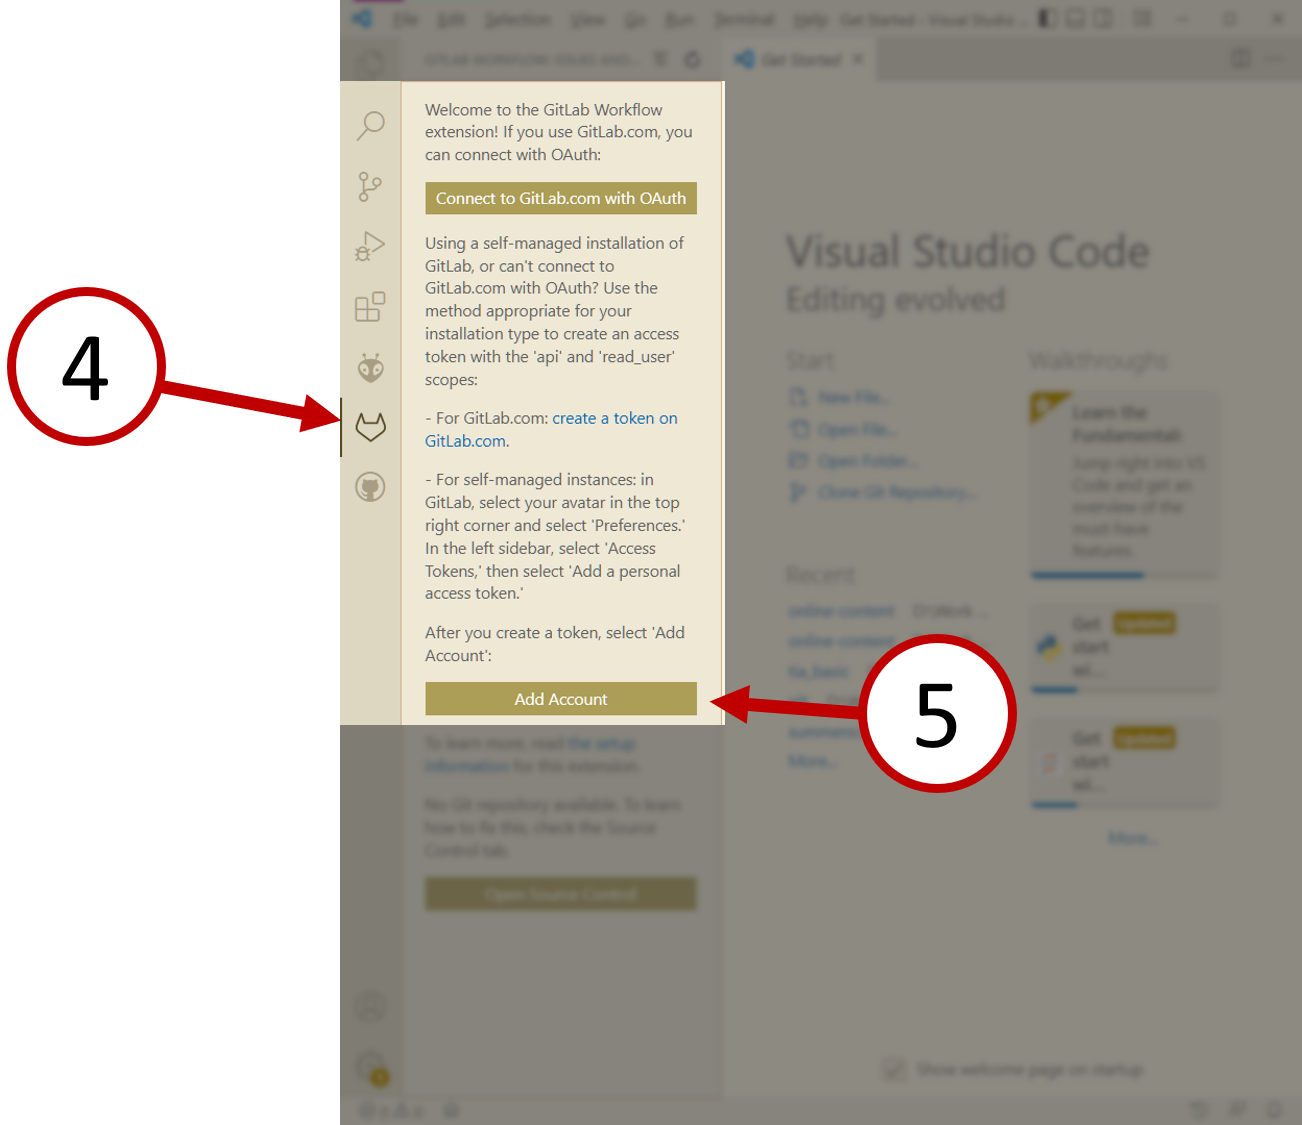
On top, you will see a bar requesting for a URL. Use https://git.fh-aachen.de/. Then it will ask for access token. Enter the token created from GitLab.
When successful, you will see a confirmation on bottom right corner.
If not already done, Open terminal inside VS Code from Terminal -> New Terminal.
For windows users -> Enter git config --global core.editor “notepad” in it.
Enter git config --global --edit in it. A file will open in text editor. In name, enter your full name and in email, enter your fh-email id example firstname.lastname@alumni.fh-aachen.de
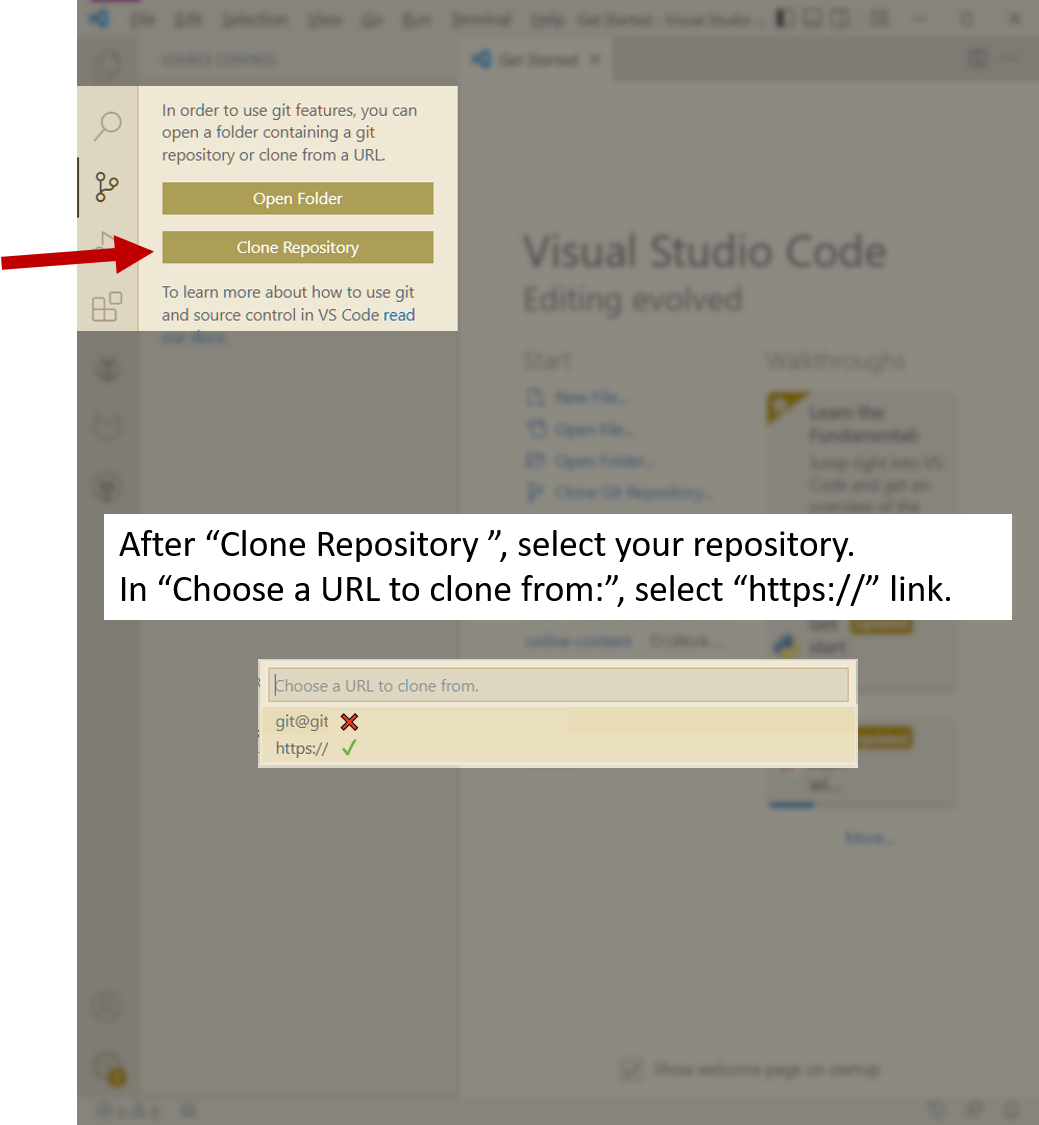
Now you can create / clone new repositories.
Warning
When cloning a repository, please use https:// URL. The git@git is used when setup done using SSH.
The Arduino extension for VS Code will automatically detect installed Arduino IDE. If in case it doesn’t happen, follow the steps below:
Open Extensions from Activity Bar. Search Arduino extension.
Click on small gear ⚙ (manage menu) next to it. It will open a new menu.
Click on Extension Settings. New tab will open.
Scroll down and find Arduino Path
Enter the complete installation address of your Arduino IDE. C:Program Files...
To use the extension, follow the steps below:
Open VS Code. Click on Open Folder from the startup interface. Open the folder Documents -> Arduino. If the folder is not found inside Documents, create a new one named Arduino. Open the Arduino folder.
Inside Arduino folder, click on New Folder from top bar and name the folder. PLEASE DO NOT INCLUDE SPACES IN NAME. USE UNDERSCORES ( _ ). Example, my_first_code
Open the new created folder. Once inside the new create folder and click on Select Folder from bottom.
VS Code will open with the selected folder.
Open Command Palette -> Arduino Initialize. A pop-up will ask for file name.
Enter the file name. PREFER USING SAME NAME AS FOLDER NAME. Press enter once done.
Select the required board. Enter UNO AVR board from the selection list.
Once done, you will find a project file with extension .ino and a folder .vscode in your Side Bar.
The following commands have to be used after initial setup:
Board Config: To change the development board.
Select Serial Port: To change the serial port of connected device.
Verify: To compile the code and check for syntax errors. This only compiles the code, does not upload it.
Upload: To build the code and upload it to connected board.
Library Manager: Allows management and download of external libraries.
Open Serial Monitor: To open serial monitor to see device logs and user based serial print statements.