2. General information
Node-RED is a programming tool for wiring together hardware devices, APIs and online services in new and interesting ways. It provides a browser-based editor that makes it easy to wire together flows using the wide range of nodes in the palette that can be deployed to its runtime in a single-click. (ref: Node-RED)

2.1. Start/Stop Commands
To start Node-RED use the following command in Command Prompt (CMD):
node-red
To stop Node-RED use the following keyboard combination in same CMD window:
Ctrl-C
Once you start Node-RED, you can then access the Node-RED UI using the IP address. It is usually http://localhost:1880 or http://[IP_ADDRESS_OF_PC]:1880
( REMEMBER TO REPLACE [IP_ADDRESS_OF_PC] WITH YOUR PCS IP! To find, use ipconfig )
2.2. About
- Node-RED includes the follow concepts (ref: Node-RED) :
Node: Basic building block of a flow. You use these to form the flow of your code.
Configuration Node: Used to store and initialize configuration information. For example providing IP address of PC if you want to receive data via LAN or WiFi.
Palette: Contains the available nodes which can be used to create the flow.
Flow: Nodes interconnected to form a logical data path. It has input, processing functions and output. The flow tab on the top bar shows workspace which can have multiple flow diagrams.
Message: Data which gets passed inside a flow.
Context: Way to store information which can be shared between nodes without using messages that pass through a flow.
Subflow: Creating an abstraction layer for a set of nodes. It helps to group certain nodes and represent them by a single node.
Wire: Connector between nodes.
Workspace: Area where you drag drop nodes and make flows
Sidebar: (on right side) Provides tools and settings to manage and debug the nodes and the messages related to them.
All available nodes are listed on the left side of the window. Each node accepts and/or emits a message. By dragging a node into the flow (middle), it is added to the message processing. ‘
On the right side the info, debug und dashboard tab can be found. Info displays information about nodes and their documentation and debug shows debug messages.
The red Deploy button starts the execution of the flow and applies changes.
Note
When you deploy your flow, it automatically gets saved. You do not need to find a save button. When you open Node-RED next time, your flows will load automatically.

Fig. 2.8 Node-RED UI
Todo
Please refer the following link for complete information: ( https://nodered.org/docs/user-guide/ )
Hint
Node-RED is based on Javascript. You need not know in-dept about Javascript but can have basic idea from here: ( https://www.w3schools.com/js/default.asp )
2.3. Help
You can access help function inside Node-RED. To do so, click on the book icon ( 📕 ) from the sidebar. Then click on the node you want the information about.
To use this, click on the node -> then click on Book Icon.
3. Nodes
- To add a node, simply drag them from the panel on the left. There are few core nodes which act as building blocks. These are:
Inject: Pushes fixed data into a flow. You can set repeat interval in its node settings. Supports different types of message types like string, number and timestamp (Source Node)
Debug: Receives all types of messages and displays them in Debug sidebar. Used to analyze messages and find issues. (Sink Node)
Function: To manipulate the message using Javascript as programming language.
Change: To modify message properties as per requirement.
Switch: Switch Statement as in programming terms. Switch message to different output as per given condition.
Template: Creates a text string which fills a specified blank. Example, The temperature today is {{payload}} degrees.
To configure a node, double click on it. A panel will open usually on right side.
Hint
Quick-Add dialog provides an easy way to add a node to the workspace by holding the Ctrl or Command key when clicking on the workspace.
4. Flows
After adding multiple node, connect the output of nodes start nodes to the input of end nodes. This is how you can create a flow.

Hint
You can comment / disable a flow by selecting all the nodes in that flow and then open Action List. You can do this by following key combination CTRL + SHIFT + P. If this doesn’t work, change the keyboard shortcuts for Show Action List from ☰ menu (top right corner).
5. Messages
Messages in Node-RED usually have a payload property. This payload consists of the required data. All the messages are in a Javascript Object format. A _msgid is added automatically as identifier. This means that the message will be in such format:
{
 "_msgid": "12345",
 "payload": "..."
 }
To access the useful information of the message, i.e., the payload, you will use the dot(.) command. For example,
msg.payload
If you have other properties in your message, you can access them as well using the same concept of dot(.) command.
- Messages support all the Javascript accepted datatypes. Few of them are mentioned below:
Boolean - true, false
Number - eg 0, 123.4
String - “hello”
Array - [1,2,3,4]
Object - { “a”: 1, “b”: 2}
Null
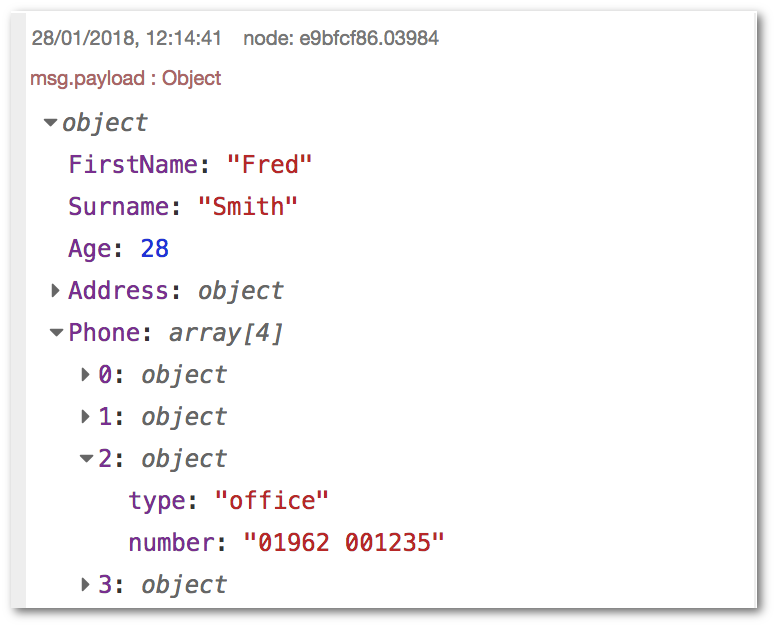
Fig. 5.15 Message structure debug (ref: Node-RED)
6. Information and Debug
6.1. Information
The Information sidebar shows information about the flows. This includes an outline view of all flows and nodes, as well as details of the current selection.

Fig. 6.24 Information (ref: Node-RED)
6.2. Debug
The data from the debug node gets printed inside the Debug sidebar. This can be found on the sidebar with icon or a bug.
By default it is selected to all nodes but you can set to required nodes if you have multiple debug nodes in your flow.
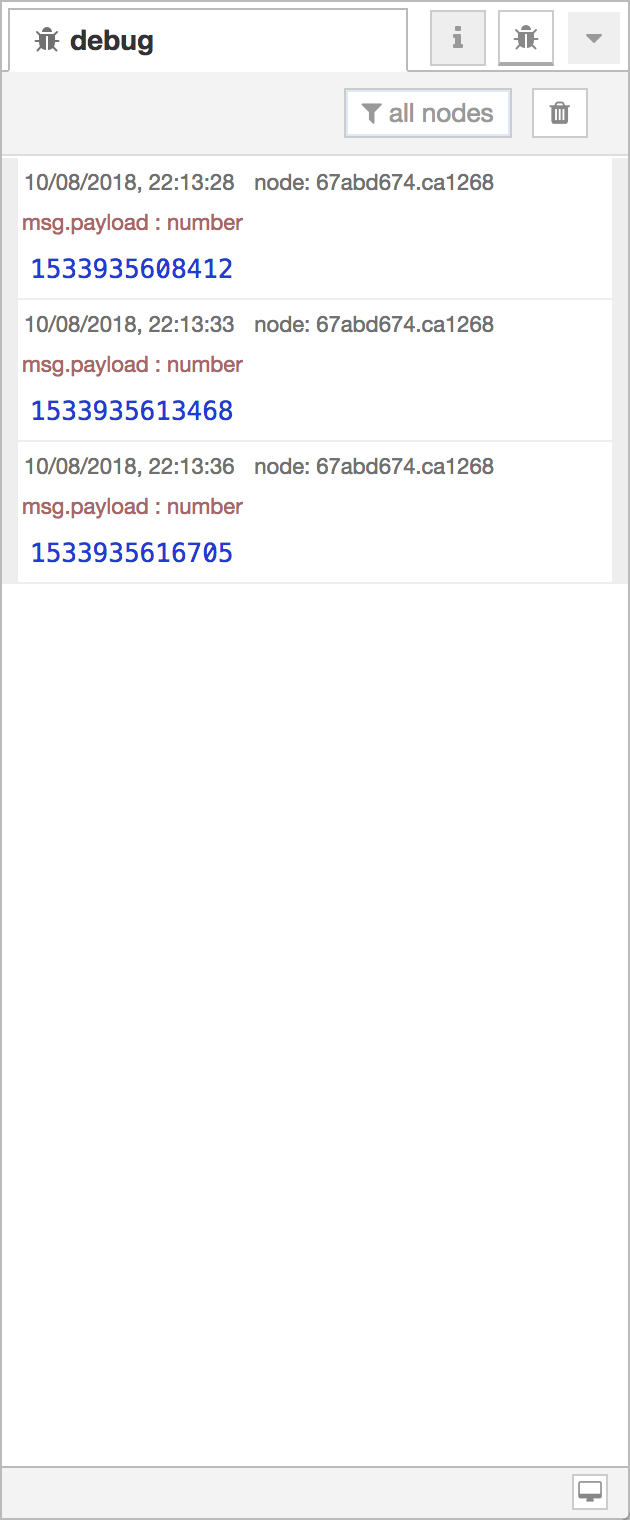
Fig. 6.25 Debug (ref: Node-RED)
Hint
You can disable the debug node but clicking on the box on the node. You need not deploy after enabling / disabling only debug node.
7. Palette Manager
It is used to install new palettes to your interface. This is like the library manager of Arduino environment.
To access this, click on ☰ from top right corner. Then click on Manage Palette.
To install a new palette, click on Install and find for the required palette. Once found, click on Install button next to that palette.
Hint
Before installing a new palette, it is always good to export all the flows.
To do so, click on ☰ from top right corner, then Export. Click on all flows and then Download. Save the file to your PC as backup file.
8. Functions
Function node allows writing custom codes using Javascript language. The message is passed inside the function as on object called msg. You can access all the properties in the message object using dot(.) command. For example, msg.payload

All the functions have already a return msg; statement. This send the message out of the function. You can also pass null if your function return nothing, i.e., void function. It is important to always return a msg object. DO NOT RETURN STRINGS OR NUMBERS.
// WRONG IMPLEMENTATION

var newMsg = msg.payload.length;  // sends integer value out of function as length is number
return newMsg;
// CORRECT IMPLEMENTATION

var newMsg =  { payload: msg.payload.length };  // sending length as a property
return newMsg;
More information about functions can be found here ( https://nodered.org/docs/user-guide/writing-functions )