6. Calibration
Calibration is done to remove misalignment of servo motors. If not done properly, the robot will have issues in walking due to imbalance and jerky movements.
- To calibrate Bittle, there are five methods,
Use Mobile App (First choice)
Use Desktop App.
Use Serial Monitor inside Arduino IDE / PlatformIO.
long-press the battery and boot up the robot with one side up. It will enter the calibration state automatically.
Press 📐 (calibrate) button on IR remote.
Note
The following steps in image are same for all methods.
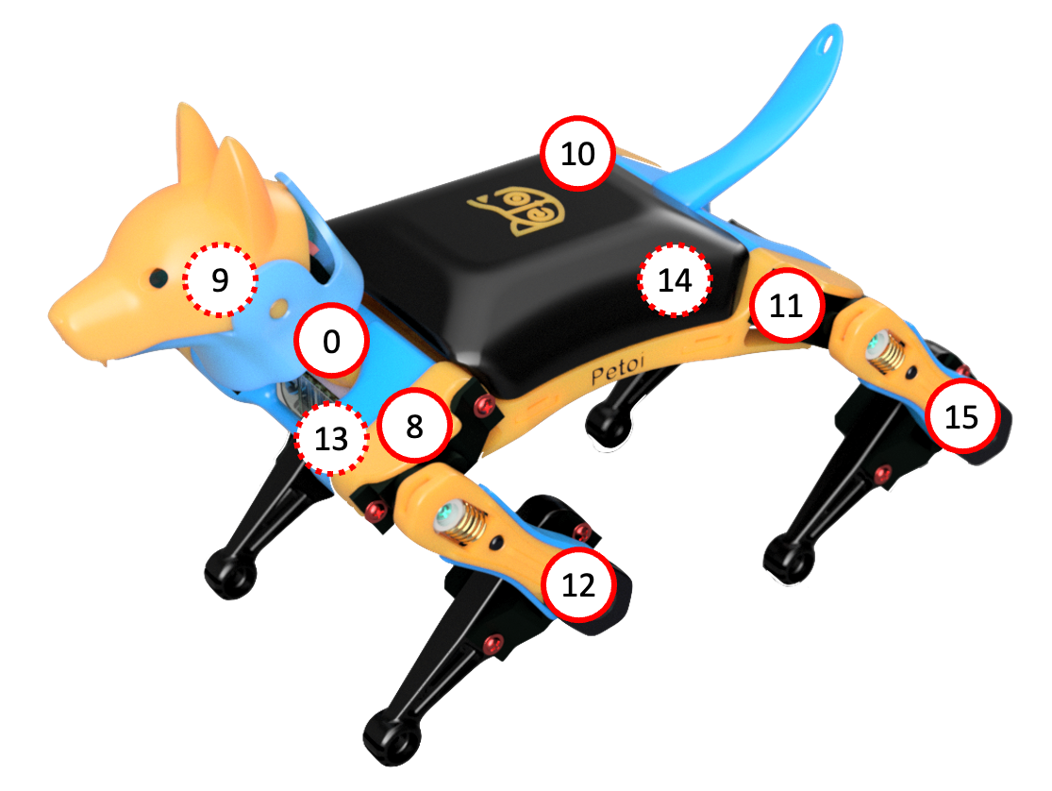
Fig. 6.12 Motor index for calibration.
Calibration Tool (L tool):
It’s especially important that you keep a parallel perspective when calibrating Bittle. Use the ‘L’-shaped joint tuner as a parallel reference to avoid reading errors.
Align the tips on the tuner with the center of the screws in the shoulder and knee joints, and the little hole on the tip of the foot. Look along the co-axis of the centers.
For each leg, calibrate the shoulder servos (index 8~11) first, then the knee servos(index 12~15). When calibrating the knee, use the matching triangle windows on both the tuner and shank to ensure parallel alignment.
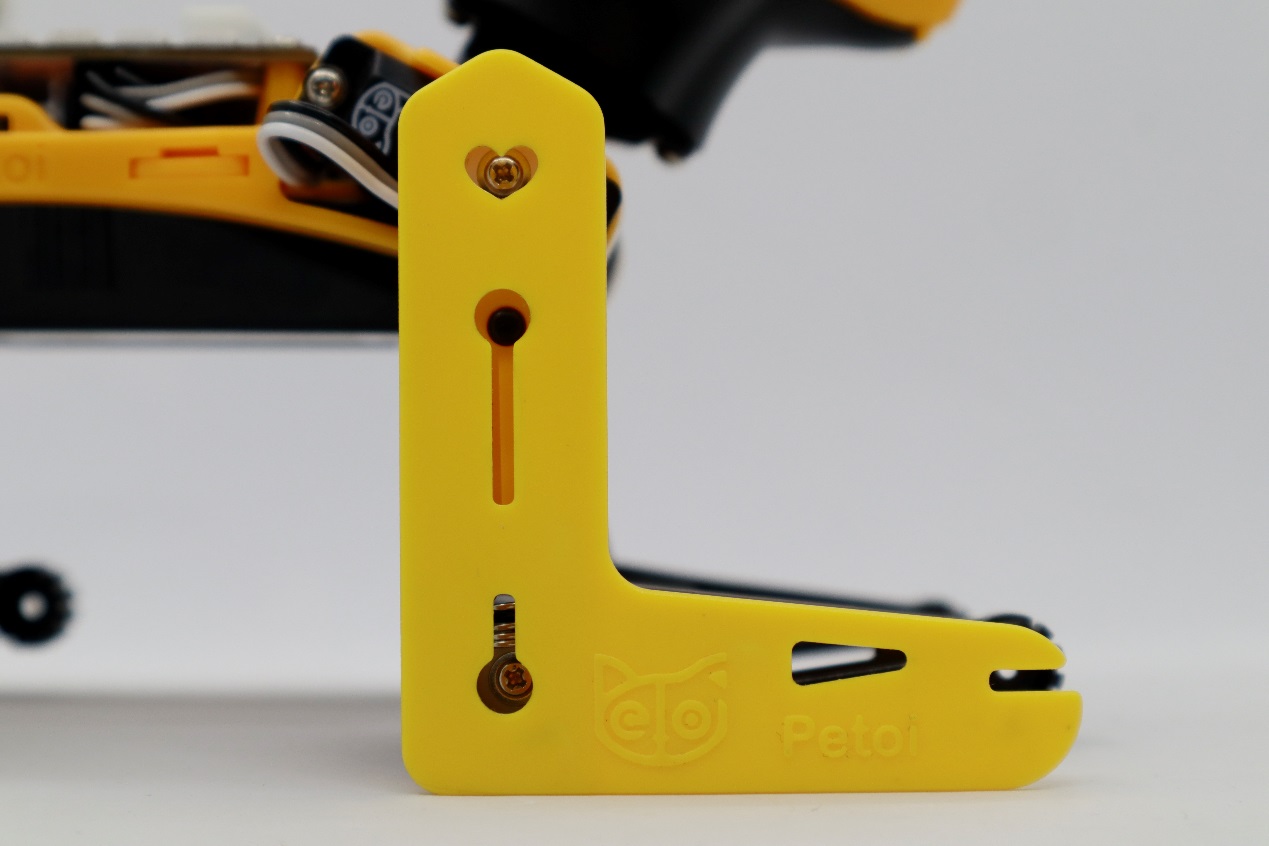
Fig. 6.13 Calibration Tool placement (L tool).
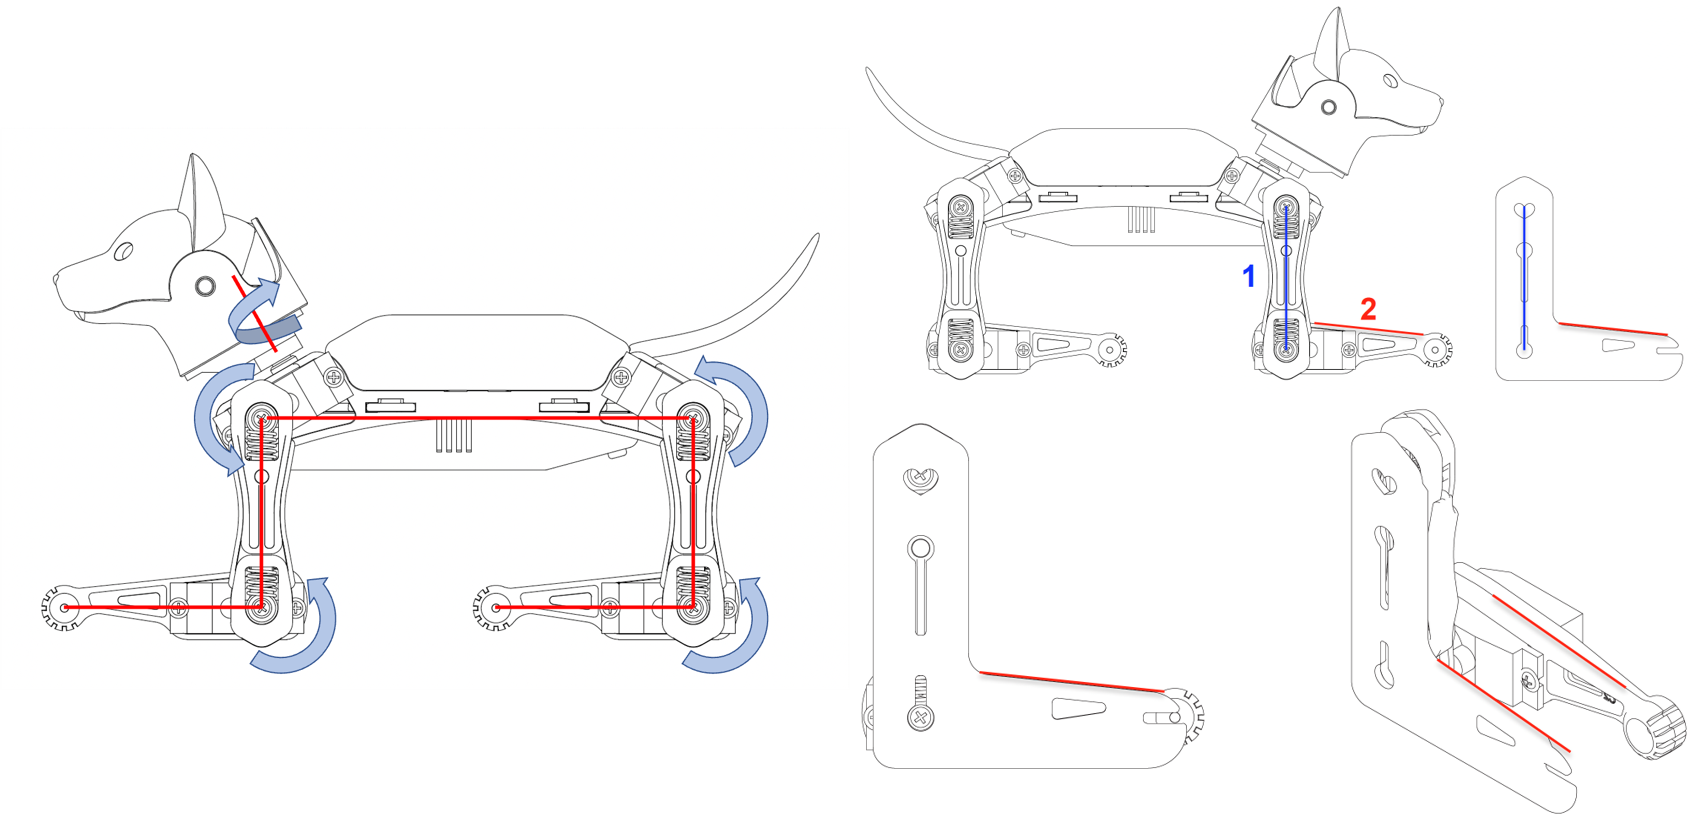
Fig. 6.14 Visualization of precise calibration (on left) & Usage of calibration tool (on right).
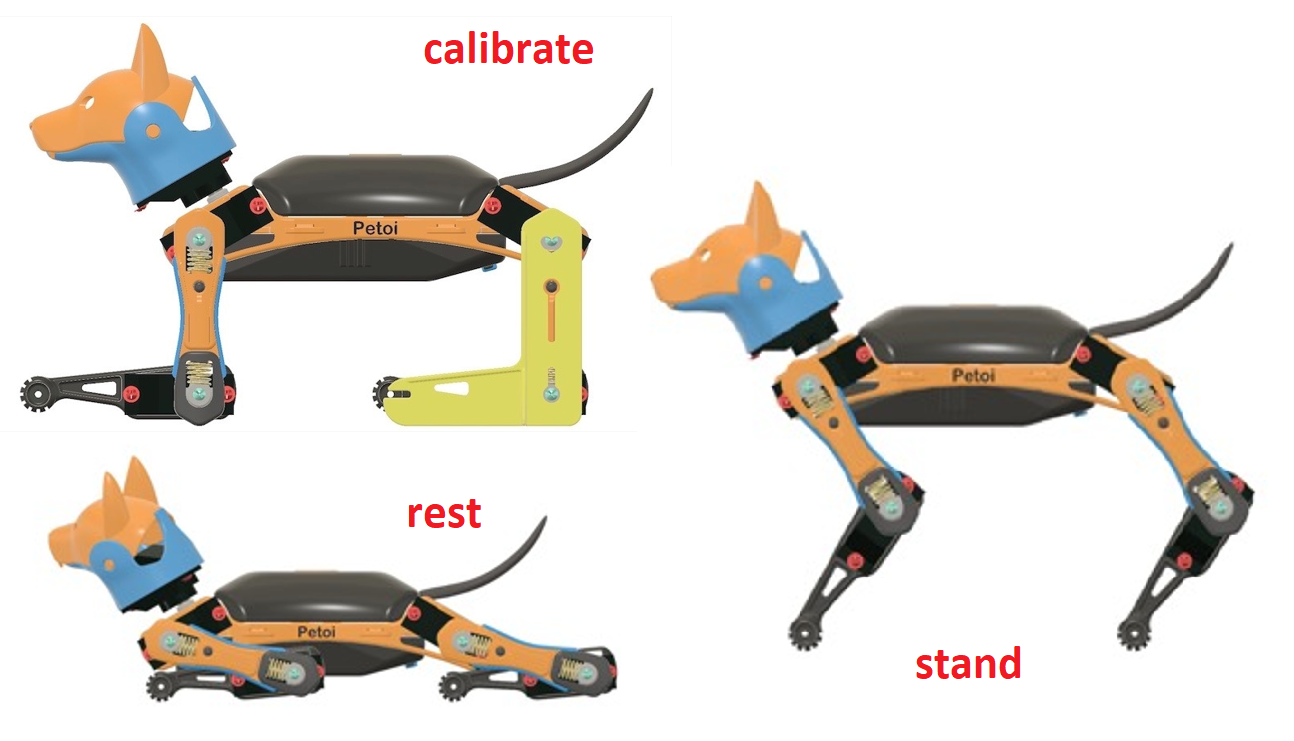
Fig. 6.15 Various postures of Bittle used for calibration.
Servo Gear:
The servo gear in the image below divides 360 degrees into 25 sectors (1 gear tooth = 1 section), each taking 14.4 degrees(offset of -7.2~7.2 degrees).

Fig. 6.16 Servo gear.
Center of mass:
Try to understand how the robot keeps balance even during walking. If you are adding new components to the robot, try your best to distribute its weight symmetrically about the spine. You may also need to slide the battery holder back and forth to find the best spot for balancing. Because the battery is heavier in the front, you can also insert it in a reversed direction to shift the center of mass more towards the back.
Danger
- Before calibrating, PLEASE check the following:
All connections are tight and no loose wires are hanging from the robot.
Battery is completely charged
Additional adaptor used is connected properly and the pins are in exact order.
Danger
Please do not force the robot to add heavy objects, which may cause the servos to sweep or get stuck.
Note
If something is not working, please check Problem Solving section.
6.1. Using Mobile App
To use Mobile App for calibration, you need to install Bluetooth Adaptor to Bittle.
Warning
Pay close attention to the Bluetooth Adaptor’s pin order in the image below.
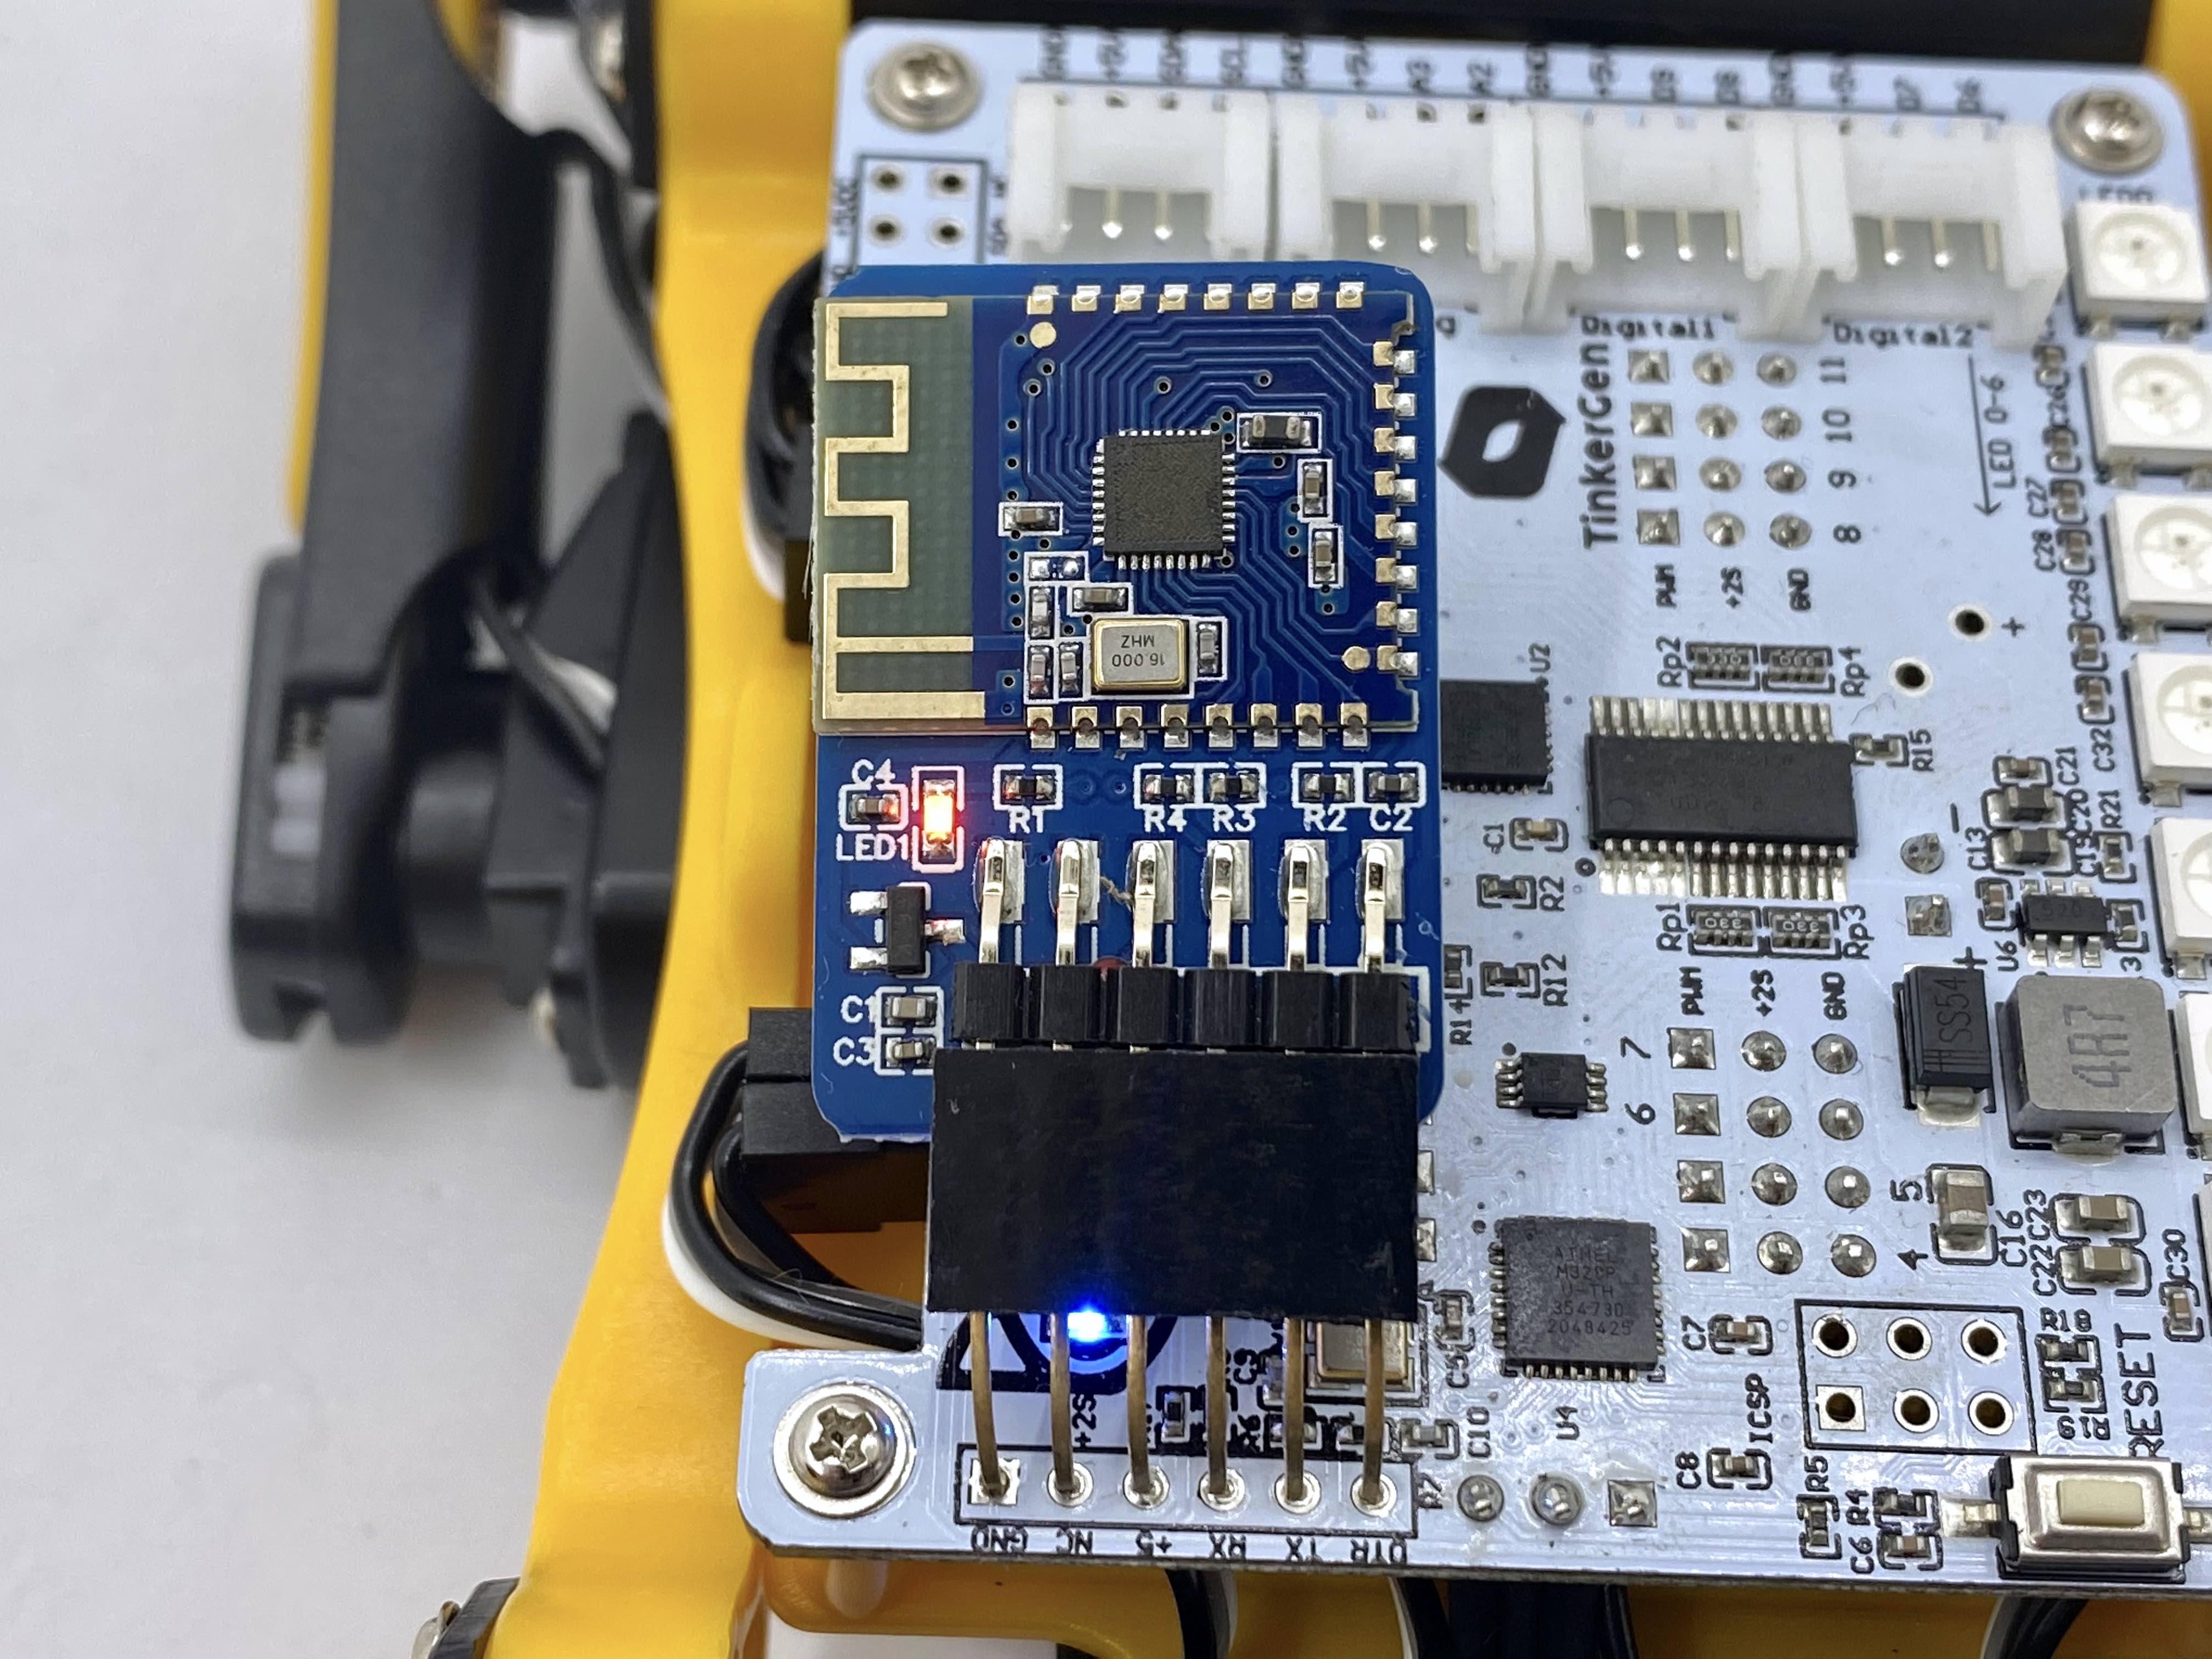
Fig. 6.17 Bluetooth Adaptor connection to Bittle
- After connecting the adaptor and powering the Bittle, the LED on the adaptor should blink to indicate that it’s waiting for connection. To pair it with app follow the steps below:
Download the mobile app. Android ` and iOS <https://apps.apple.com/us/app/petoi/id1581548095>`_
Open the app and scan available bluetooth devices inside the app. (DO NOT connect Bittle from Phone’s system settings.)
Grant permissions to the App to use Bluetooth services.
Bittle may show with the following names in the App: Bittle, Petoi, or OpenCat.
Select Bittle in Robot Selection (if asked by the app).
Once done, you will be redirected to control dashboard.
Calibrate Bittle:
Tap the triple dot menu from TOP RIGHT corner. Select Calibrate. Follow the on-screen instructions to fine tune your robot.
After calibration, remember to tap the Save button to save the calibration offset. Otherwise, tap < (back) in the TOP LEFT corner to cancel the calibration values and set them to previous values.
Warning
If the offset is more than +/- 9 degrees, you need to remove the corresponding part of the servo and re-install. Please refer this for details.
6.2. Using Desktop App
To use Desktop App for calibration, you need to install USB Adaptor to Bittle.
Warning
Pay close attention to the USB Adaptor’s pin order in the image below.
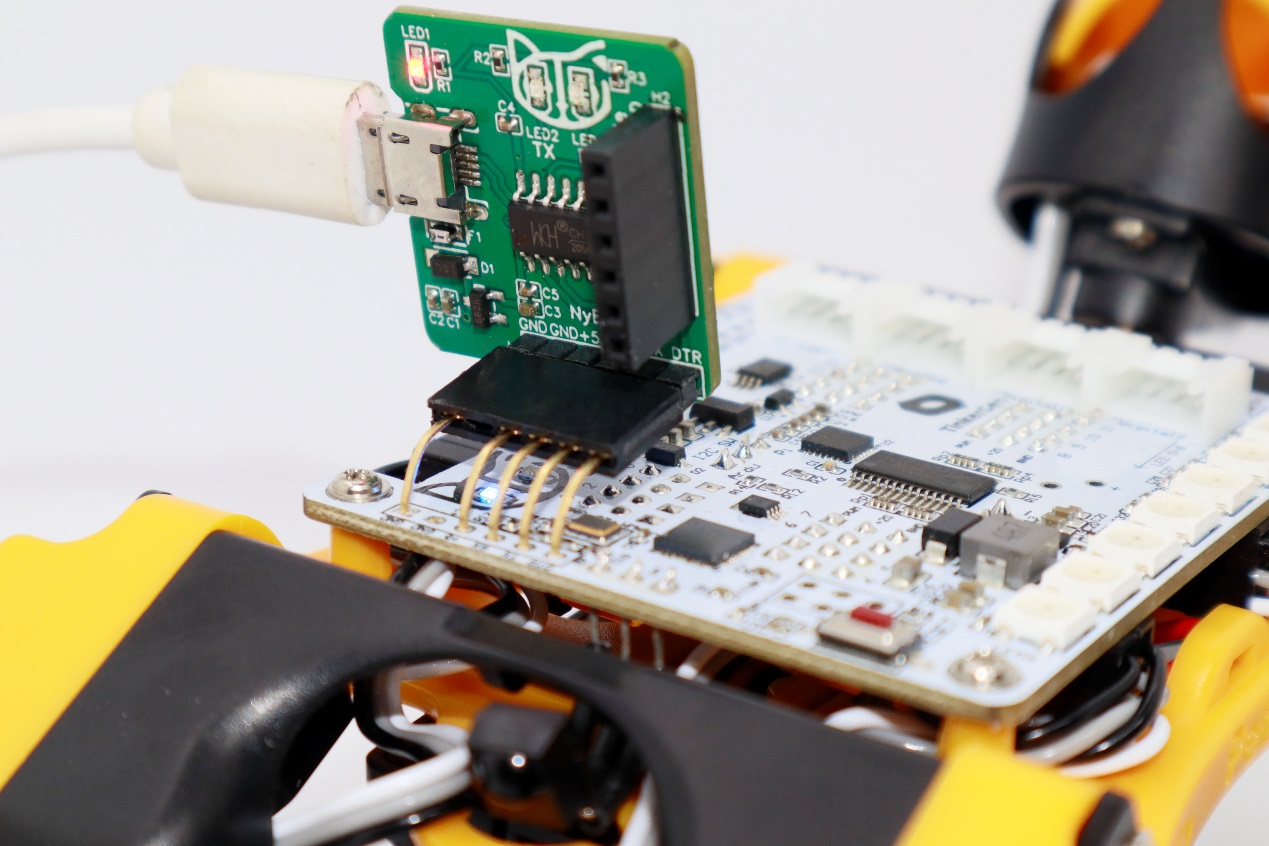
Fig. 6.18 USB Adaptor connection to Bittle
- After connecting the adaptor and powering the Bittle, follow the steps below:
Download the desktop app. Windows & Mac
Open the app and select the robot model as Bittle. Select the interface language (is asked).
Click on Joint Calibrator. You will be redirected to calibration interface.
Click on Calibration/Calibrate button from interface to set all servos in calibration position.
Select the Slider thumb and set it to required value to calibrate the motor angle using L tool.
You can change the posture of the robot from stand to rest to test the motor calibration.
After calibration, remember to click the Save button to save the calibration offset. Otherwise, click Abort (back) in the TOP LEFT corner to cancel the calibration values and set them to previous values.
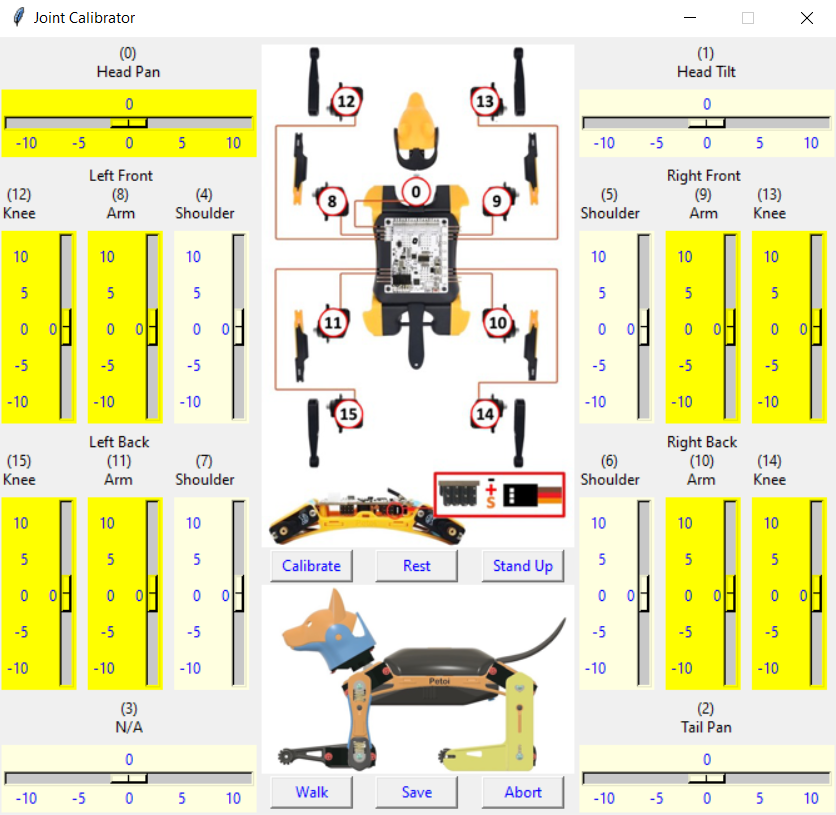
Fig. 6.19 Desktop calibration interface
Warning
If the offset is more than +/- 9 degrees, you need to remove the corresponding part of the servo and re-install. Please refer this for details.
6.3. Using Serial Monitor
To use Serial Monitor for calibration, you need to install USB Adaptor to Bittle.
Warning
Pay close attention to the USB Adaptor’s pin order in the image below.

Fig. 6.20 USB Adaptor connection to Bittle
- After connecting the adaptor and powering the Bittle, follow the steps below: (Image attached below for reference)
Download the Arduino IDE / PlatformIO
Open IDE, select COM Port and open serial monitor. Select Baud rate as 115200 and line ending as no line ending.
Enter c in serial monitor to enter calibration mode.
You will receive 2 rows of numbers. The first row signifies the index of the motor, the second row signifies the current calibration offset value.
To set a custom offset value, use the following -> c<servo index> <offset value> example c8 6 means giving the 8th servo an offset of 6 degrees.
Use the L tool to set the angles to required value to calibrate the motor.
Once done, type s to save the calibration values. (You can even save every time after you’re done with one servo.)
Wait until you see Ready on serial monitor.
After calibration, type d or kbalance to validate the calibration.
Warning
The resolution of the correction amount is 1 degree, do not use decimals.

Fig. 6.21 Sample serial control
Warning
If the offset is more than +/- 9 degrees, you need to remove the corresponding part of the servo and re-install. Please refer this for details.